 Project Duck News
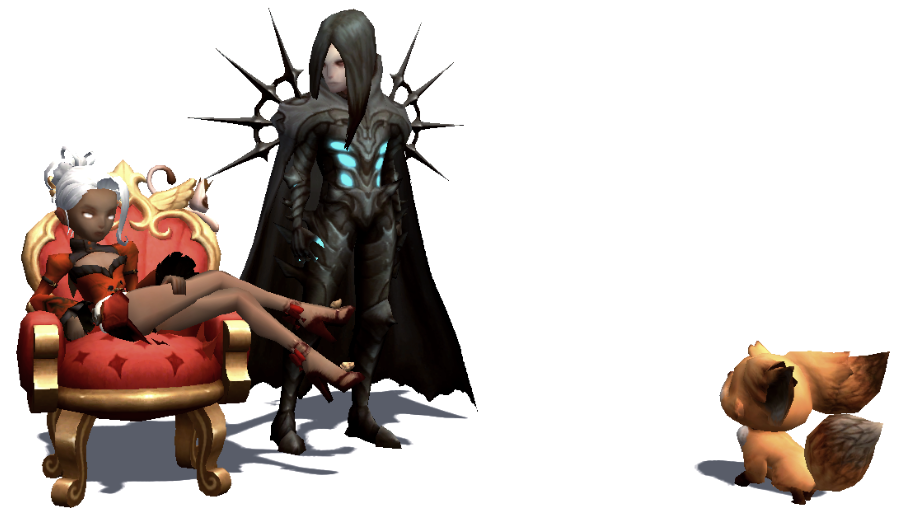
Self Introduction
Hello! I am Circles (mysexyhoe#2598). I’ve been playing Dragon Nest since NA Open Beta and Project Duck since July 2019. My first character was a Mystic who later specialized into the majestic Chaos Mage.
Class
“When her Majesty isn't tearing her enemies apart with the power of gravity, she enjoys moonlit nights and long walks on the beach.”
Chaos Mage is a class that rewards optimal skill set ups with great burst damage. In other words, it rewards players who properly time and position their skills and accurately predict boss mechanics to effectively deal damage. She is consequently considered the most difficult Sorc class to play due to her micromanagement gameplay. She is also ping-reliant so you may have more difficulty playing her if you are not located near NA East.
(If you're interested in learning about other classes, we have a Class Guide Archive) - Vino
Skills
The skills are explained with the assumption that you have learned their respective awakening, class mastery, and EX passives.
These terms are used interchangeably:
- [Gravity Ball] and “orbs”
- [Meteorite] and “bubbles”
- Boss “mechanics” and “movements”
Sorceress
[Air Strike]: :d
[Toxic Spray]: Cast wherever the boss normally spawns to end its iframe early or to know when its iframe ends.
[CM3 Dark Nova]: Fast and simple cast time with decent damage. Spam this off cooldown when it’s not used to chain into [CM3 Gravity Well].
[Mana Flow]: A buff that grants cooldown reduction, elemental damage, and reduction to MP consumption to yourself and party members. It is commonly referred to as the “CDR buff” or “sorc buff”. Rebuff when necessary.
Mystic
[Gravity Blast]: Quick and easy cast to spawn [Gravity Ball]. Often used together with [Triple Orbs INS] to cancel the end lag of the skill. Spam this off cooldown.
[Triple Orbs]: Your main combo will generally be: Proc [CM II] → [Gravity Blast] ↔ [Triple Orbs INS] → [Triple Orbs] ↔ [Black Hole] → [Gravity Rush] → [Focus Gravity]. For large bosses that tend to stay in position, cast [Triple Orbs] before [Black Hole] because it deals more damage and its orbs are easier to stack for [Gravity Rush].
[Black Hole]: For bosses that are smaller and/or tend to move frequently, cast [Black Hole] before [Triple Orbs] because it has a shorter lingering duration, spawns all three orbs quicker, and deals more effective damage with its huge area of effect as well as its [Gravity Balls].
[Summon Comet]: Filler skill that’s used last in your rotation due to its long animation. For the awakening version, cast whenever [Meteorite] procs before the bubble(s) expires after 30 seconds. There can be pauses in your rotation when [Meteorite] is not in your RNG favor.
[Gravity Crush]: Cast whenever it’s off cooldown to debuff the enemy’s elemental resistance. Each hit refreshes the debuff duration. The skill should sometimes be saved for mobbing mechanics such as Kodiak’s Babies in IDN.
[Meteor Storm]: [Left Click] when you start to rise so you can freely move and have the skill to continue dealing damage. You can use its iframe before you [Left Click] to dodge attacks that require a longer iframe duration than that of [Blink] such as IDN’s Dragon Spin or you can cast the full animation to avoid prolonged attacks. The latter is normally used for emergencies when you’re in an unsafe position and both [Blink] and [Teleport] are on cooldown. Otherwise, cast whenever it’s off cooldown for filler damage.
[Teleport]: Your best evasion skill– also great for repositioning and playing more aggressively. You’re immediately invulnerable at the start of the animation. Cast any time with or without [Direction Key] to travel. If [Teleport] is on cooldown, you can [Blink] when casting [Triple Orbs] + INS, [Gravity Well], or [Gravity Rush].
[Gravity Spark]: Can be used to reposition when you’re using it to combo with or without [Triple Orbs INS] and [Teleport].
[Gravity Trap]: Extends the duration of [Gravity Ball]; The maximum duration of the orbs when used with this skill can almost last 30 seconds. Example scenarios include but are not limited to: prematurely setting up your orbs when the boss is temporarily invulnerable such as Balapa's 50% Mech in IDN and extending the orb’s duration for [Gravity Rush] when the boss stays in place such as Kodiak’s Babies in IDN.
[Force Shield]: Requires you to get hit in order to receive the magic attack and reduced damage taken buff at a 10% chance rate. Most of the time, it’s not worth the bother to proc the skill. However, multi-hit attacks such as GDN’s Kraken Roar can increase your chances to proc the buff.
[Nine Tail Laser]: Filler used when your main skills are on cooldown.
[Force Mirror]: The pulses emitting from the mirror refresh the debuff duration six times for every two seconds before the mirror disappears. The skill mainly serves two purposes: it can debuff multiple enemies and block incoming projectiles such as IDN Kodiak’s Babies and IDN Dragon’s Ice Balls. For projectile blocking, do not stand directly behind the mirror or you will take damage from the contact explosion. For solo play, always cast [Force Mirror] → [Gravity Crush]. For parties/raids, it’s rarely casted other than the purposes listed unless none of your party members have the damage taken debuff from their skill kit.
[Time Dodge]: [Left Click] when hit to instantly recover from getting knocked down.
[Fast Forward]: Your bread and butter skill. Chaos Mage relies heavily on lingering, stationary skills to deal damage. She shines in environments where the boss is relatively still for a long time or where she’s able to predict boss movements. Therefore, clear knowledge of boss mechanics is essential to optimize [Fast Forward]. Cast when there are no incoming debuff or invincible mechs, or when the boss will stay in place such as IDN Dragon Plummet, IDN Dragon’s Braziers, and IDN Kodiak’s Babies. Some bosses and their mechs are not always predictable so optimizing [Fast Forward] can be difficult.
[Beyond Time]: Referred to as “pt FF” or the party version of [Fast Forward] for short, your cooldowns– 80% cooldown reduction for 15 seconds– are not affected when you learn this skill. More often than not does the party rarely benefit from the buff. If you still choose to support in a raid setting, create a dual skill build: one with only [Fast Forward] learned and the other with [Fast Forward] and [Beyond Time] learned.
Chaos Mage & Awakening
[Mystic Mischief]: Aside from its Dark Attack self-buff, the skill allows you to copy– not steal– one buff from an enemy. This effect only works on buffed small enemies and mini bosses. Either a buff icon shown above their heads or a notification message that says they’re enraged means a buff has been applied to them. Rebuff when necessary.
[Gravity Well]: Chaos Mage is flexible with how she uses [Gravity Well] to deal damage. There are three versions of the skill. Damage priority is shown from strongest to weakest / top to bottom:
- [CM3 Gravity Well]: Cast a skill such as [Blink] or [Gravity Blast] to cancel the animation lock and continue with your rotation. This deals the most damage but it has a long casting animation and requires the boss to stand within the area of effect for a few seconds. For this reason, this version is best used when you know the boss will stand still for a moment, especially when they just finished casting a mech.
- [Gravity Well INS]: Instantly deals all of its damage, in exchange for damage lost from the first three hits. This version is mainly used when there’s no time to cast the CM3 version and most of your main skills are off cooldown. Once you cast the INS version, be mindful of your dodging since [Teleport] is also on cooldown.
- [Gravity Well EX]: [Left/Right Click] after the third hit to effectively deal all of its damage. If you wait until the third hit/wave to [Left/Right Click], this version slightly deals more damage than [Gravity Well INS]. You can also [Left/Right Click] at the beginning of the skill, in exchange for damage lost from the first few hits. This version is mainly used when there’s no time to cast the CM3 version and most of your skills are on cooldown.
[Gravity Mastery]: A red indicator glows and flashes on the [Gravity Ball] for 3 seconds before the orb disappears. When the self-transparency setting is set above zero, the visibility of the orbs can glitch and differ from one another.
Gravity Rush
Strategic positioning with your orbs is necessary to deal proper damage with this skill. The damage becomes more rewarding as you gain more experience with the boss and their mechanics. The custom ability to cancel the animation early makes this skill more reliable than [Focus Gravity] to explode your orbs as there are virtually no chances of your orbs from ghosting. It also adds more flow to her gameplay and provides more repositioning abilities. Personally, this skill is more fun to explode your orbs with- you turn into a Gravity Ball yourself!
If available, [Left Click] will activate [Gravity Spark] and [Right Click] will activate [Dark Wave]. If neither are available, the skill jumps to the end animation with either input.
- [Known Issue]: Either input used to end [Gravity Rush] early results in a sliding movement and the end animation is performed twice.
- [Method 1]: Cast like you normally would. [Right Click] to end the skill early, then use a skill such as [Focus Gravity] to cancel the first end animation. The sliding movement has no hitbox. This method is best used when your [Gravity Balls] are more spread out.
- [Method 2]: [Gravity Rush] can be canceled “instantly”, but it’s not as reliable as the first method. The combo [Gravity Rush] → [Direction Key] + [Right Click] allows you to end the skill early and grant the sliding movement the ability to explode orbs, even when you’re not transformed as a Gravity Ball. You can slide longer and continue to explode orbs if you let go of [Direction Key] + [Right Click] after the first end animation, albeit you move a bit slower and reach a shorter distance and range compared to the first method. You can quickly chain into a skill such as [Focus Gravity] afterwards. The hitbox from the sliding can be inconsistent which results in orb ghosting. Factors include ping and delayed inputs. This method is best used with reliable ping and your [Gravity Balls] are stacked close together.
Focus Gravity
Aim at the head of the boss every time you cast the skill so your [Gravity Balls] have a much greater chance of redirecting. Waiting a bit to [Left Click] or delaying the input as you’re aiming can help make the skill more reliable. Always detonate your orbs with [Gravity Rush] or [Focus Gravity] before they expire and disappear. When your orbs flash red, prioritize [Gravity Rush] or [Focus Gravity] before casting other skills.
[Focus Gravity]’s damage is based on a 1:1 ratio; that is the damage shown in the skill’s info is equivalent to the damage of its respective [Gravity Ball]. For example, [Gravity Blast] has a damage value of 3039%. The skill explodes three times and generates three [Gravity Balls]. The orbs each have a damage value of 3039%. When [Focus Gravity] is cast, the three orbs in total deal 9117%.
Pushing Skills
Whenever you need to push objects.
[Witch Slap], [Fire Burst], [Wheeling Staff], [Shockwave], [Gravity Blast], [Gravity Spark], [Nine Tail Laser]
Disabling Skills
Known for her crowd controlling abilities (CC for short), Chaos Mage can temporarily disable her target’s movements for long periods of time. However, the effect only applies to small enemies and mini bosses.
- [Time Stop] and [Gravity Crush] → Completely disables movement.
- [Gravity Trap] → Reduces movement and action speed by 60%.
Examples: BDN Dragon Phase 1, DDN Manticore/Scorpion Mech, RDN Jasmine Bar Mech, IDN Dragon Punisher
Skill Build
Unified Skills: Max HP Boost, Ultimate CDR
Skill Crests
[Gravity Blast CDR] / [Triple Orbs DMG] / [Summon Comet DMG] / [Fast Forward CDR] / [Gravity Well DMG] / [Dark Nova CD] / [Gravity Trap CD]
Skill up: +1 Gravity Well
Skill Gems
Headgear: Redemption
- Has a chance when hit to proc an effect that significantly increases your Super Armor for 10 seconds. This allows you to continue dealing damage and tank hits that normally knock you back.
Weapons and Rings: 4 Omega Elemental
- The best current gem setup with +20 Midnight Frost Gear, T6 Evolving Radiance Accessories, T5 Crests & Talismans, and +5 Main Stat Gems to maximize your damage.
Weapon Debuff:
- Forsaken Village (Dark) and Marion (Magic Def)
- Look at the top left side of your UI to know when the weapon debuffs will proc. Though not shown, the engraving debuffs will also proc at the same time. Deal as much damage as you can and cast [Gravity Rush] or [Focus Gravity] before the weapon debuff durations expire.
Gameplay
“The Mystic alters the very fabric of reality, confounding her enemies by twisting gravity, light, and time itself.”
Optimal Positioning
Be aware of when you time and position your skills and where you are currently positioned in the map. Taking small movements to optimally position yourself as you’re casting your skills can make a noticeable difference in your gameplay and your ability to effectively deal damage. This becomes evident as you play more aggressively. A prime example is how you move a few steps forward when you cast [Gravity Blast] and [Triple Orbs]. Generally, you want to stack your [Gravity Balls] as neatly as possible so it is easier to use [Gravity Rush]. Because of these short forward movements from casting these two skills, you have to reposition yourself in between the skill casts. Aside from this, the short movements from [Gravity Blast] and [Triple Orbs] can help you dodge incoming attacks if you’re just an inch away and you don’t need to [Blink] to entirely reposition. A second example is the distance you control when you [Blink] → [Gravity Spark] → [Triple Orbs INS]. You can either entirely reposition or stay in place depending on how long you wait to cast [Gravity Spark] after [Blink].
For solo gameplay, you want to stick to the edges of the map so the boss doesn’t move around as much. Since you are soloing, you should have full control of the boss’s aggro. In cases where you are using a mercenary for its buffs, they can sometimes take aggro instead. It is even more important to stick to the edges of the map so the mercenary doesn’t move around as much and mess up your rotation.
For parties where a tank can aggro the boss, be aware of the tank’s position. For parties where there is no tank or for bosses where the aggro is randomized, pay close attention to which player has aggro. When the boss is aggroed on you, try to take advantage of where to control the boss’s movements by luring it to the edges of the map. However, you should be mindful of classes that also rely on lingering skills as their main source of damage if they are in the party.
Fast Forward Rotation
Your primary goal is to cast multiple [CM3 Gravity Wells] during [Fast Forward]. When you cast the first [CM3 Dark Nova] then use [Gravity Well] on the second [CM3 Dark Nova] before the first one disappears from its enhancement effect, the CM3 effect will apply to all existing [CM3 Dark Nova] simultaneously. This stacking effect can be extended to two [CM3 Dark Novas] then [Gravity Well] used on the third [CM3 Dark Nova]. If done correctly, a total of nine [CM3 Gravity Wells] can be cast in one [Fast Forward]. [Gravity Well] easily becomes your number one DPS skill with [Gravity Rush] ideally following after.
Standard rotation with [Harmonize] buff shown below. For mid-rotation, [Gravity Trap] can either be cast when the boss is standing long enough for you to use [Gravity Rush] at the end or when the boss is moving and you have time to cast multiple [CM3 Gravity Wells] but not [Gravity Rush] afterwards. [Gravity Rush] can be cast mid-way when the boss will move away and/or you need to explode the orbs and reposition at the same time. If your rotation is interrupted and [Gravity Well] will not be, or nearly, off cooldown when [Fast Forward] is about to expire, prioritize between [Gravity Ball] set up for [Gravity Rush] or [Awakened Comet] when 3 bubbles are up.
Proc [CM II] → [Fast Forward] → [Triple Orbs INS] → ([CM3 Dark Nova] → [Gravity Blast]) x2 → [CM3 Gravity Well] → [Gravity Blast] → [CM3 Dark Nova] → [Gravity Rush] or [Gravity Trap] → [CM3 Dark Nova] → [Gravity Blast] → [CM3 Gravity Well] → [Gravity Blast] → ([CM3 Dark Nova] → [Gravity Blast]) x2 → [CM3 Gravity Well] → [Gravity Rush]
Alternative rotation with [Harmonize] buff shown below for bosses that tend to move more frequently or erratically. This requires no set-up time for the multiple [CM3 Gravity Wells]. Although the damage output is much lower, it is practically better to instantly deal damage than to largely risk unsuccessful [CM3 Gravity Well] set-ups. The rotation shown assumes you proc no bubbles for [Awakened Comet]. When you proc [Meteorites], prioritize casting [Awakened Comet] over spamming orbs because you’ll likely be unable to land your [Gravity Rushes]. For this reason, [Gravity Trap] is sometimes cast during the rotation so you can use [Focus Gravity] after. Keep in mind that you may not always follow the exact rotation and you can even switch from the standard to alternative rotation or vice versa depending on how the boss behaves.
Proc [CM II] → [Fast Forward] → [Triple Orbs INS] → [Gravity Blast] → Proc [CM II] → [Gravity Blast] → [Triple Orbs INS] → [Gravity Well EX] → [Gravity Blast] → Proc [CM II] → [Gravity Blast] → [Triple Orbs INS] → [Gravity Rush] → [Gravity Well EX] → Proc [CM II] → [Gravity Blast] → [Triple Orbs INS] → [Gravity Blast] → Proc [CM II] → [Gravity Blast] → [Triple Orbs INS] → [Gravity Well EX] → [Gravity Rush]
Gravity Rush & Gravity Ball Positioning
Ideally your top second DPS skill, you should always position your skills that spawn [Gravity Ball] at the sides of the boss; the orbs form a “line” around– not inside– the boss’s body. If you’re using [Black Hole] to set up its orbs for [Gravity Rush], slightly angle your camera to the left/right so that two of its orbs will align with the rest of your [Gravity Balls].
Once you cast [Gravity Rush], hug the boss so any orbs that aren’t close enough to the boss’s hitbox do not explode. If the boss’s hitbox is larger than what is physically shown, you can be more lenient with your [Gravity Ball] positioning. If there’s any orbs remaining, end the skill early by chaining into [Focus Gravity].
When the boss starts to move away from your orbs, cast [Gravity Rush] regardless of how many orbs there are. Otherwise, you’ll deal less damage with [Focus Gravity].
You want to spawn as many [Gravity Balls] as you can before casting [Gravity Rush]. However, there’s no set number of how many [Gravity Balls] you should spawn since the amount of the time it takes to stack your orbs depends on how long the boss will stay in place. Therefore, cooldown optimization for [Gravity Rush] is dependent on boss movement.
Tips and Tricks: Triple Orbs & Teleport
1. You would normally [Blink] → [Gravity Spark] → [Triple Orbs INS] in your rotation. However, [Teleport] → [Gravity Spark] can sometimes be used to cast [Triple Orbs INS] instead. This combo can further be extended with [Gravity Well INS] in cases where you don’t have enough time to cast [CM3 Gravity Well] and most of your skills are already off cooldown. In a situation where you’re positioned unsafely and all your invulnerability frames are on cooldown, there’s a high chance of taking the incoming attack. It can sometimes be wise to save at least one evade so your chances of survival are greater.
a. [Teleport] → Proc [Gravity Well INS] → Proc [CM II] → [Gravity Well INS] → [Triple Orbs INS]
b. Proc [CM II] → [Teleport] → Proc [Gravity Well INS] → [Gravity Well INS] → [Triple Orbs INS]
2. [Triple Orbs INS] can cancel the end lag of another skill such as [Focus Gravity]. This effect is often called animation canceling. It reduces clunkiness and makes your gameplay more fluid. Wait a bit to cast [Triple Orbs INS] or you can completely cancel the previous skill.
3. [Triple Orbs INS] can shorten the distance of [Teleport] for more aggressive gameplay and to reposition yourself more precisely. Cast [Triple Orbs INS] before you complete the full [Teleport] animation.
4. Immediately [Turn] twice the moment the second [Triple Orb] is cast to shorten the distance for the third orb. This can help with smaller bosses or bosses with a smaller hitbox.


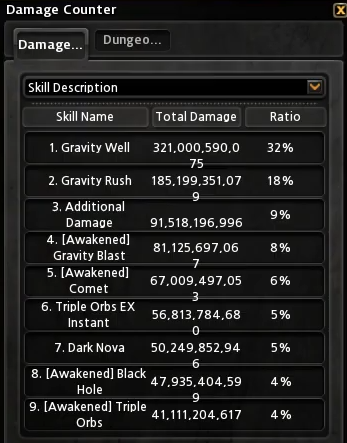
Damage / Skill Priority
The skills are ranked based on their calculated DPS over the course of a long end-game raid run with [Focus Gravity]* damage taken into account. Short descriptions are provided to summarize the skill’s priority explained previously.
a. [Mana Flow] & [Mystic Mischief]: Your primary buffs. Rebuff when necessary.
b. [Force Mirror] & [Gravity Crush]: Your primary debuffs. Mirror is normally used for soloing or to block projectiles. Both skills can be used to debuff multiple enemies with their wide areas of effect.
- [Gravity Well]: Your number one DPS skill due to your standard Fast Forward Rotation.
- [Gravity Rush]: Ideally your second top DPS skill. The skill requires a good understanding of boss mechanics. Position your [Gravity Balls] to the sides of the boss.
- [Awakened Comet]: Fast casting burst skill with a short cooldown. Can rank anywhere due to its RNG proc rate.
- [Gravity Blast]: Short cooldown, quick damage, and fast cast time to spawn [Gravity Ball].
- [Triple Orbs INS]: Fast cast time. Often used with [Gravity Blast] to cancel the end lag of the skill. Sometimes the INS and the normal version are not cast together. One way to keep track of the INS cooldown is to look at the cooldown time from [Gravity Blast].
- [Black Hole]: Slightly long cast time with its [Gravity Balls] spawning quicker than those from [Triple Orbs]. Sometimes used before [Triple Orbs] when the boss tends to move frequently.
- [Triple Orbs]: Slightly long cast time. Sometimes used before [Black Hole] when the boss is in place for a while and has a larger hitbox.
- [CM3 Dark Nova]: Fast and simple cast time with a short cooldown. Deals more overall damage than [Summon Comet].
- [Summon Comet]: Long cast time with a long cooldown but has higher burst potential than [CM3 Dark Nova].
- [Meteor Storm]: Cast whenever it’s off cooldown unless you’re saving the skill to avoid attacks.
*When [Gravity Ball] flashes red, prioritize either [Focus Gravity] or [Gravity Rush] before casting any other skill to prevent the orbs from disappearing, which will result in loss of damage.
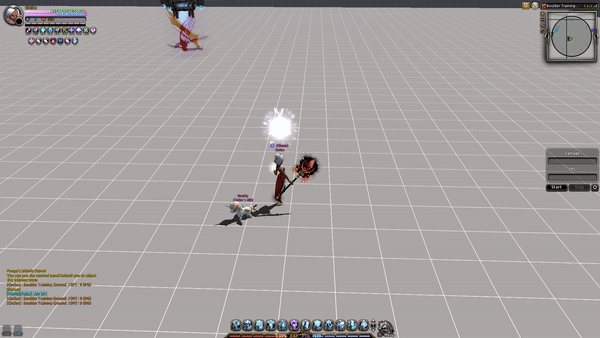
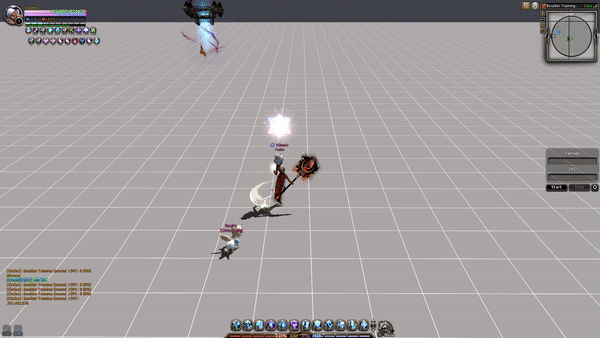
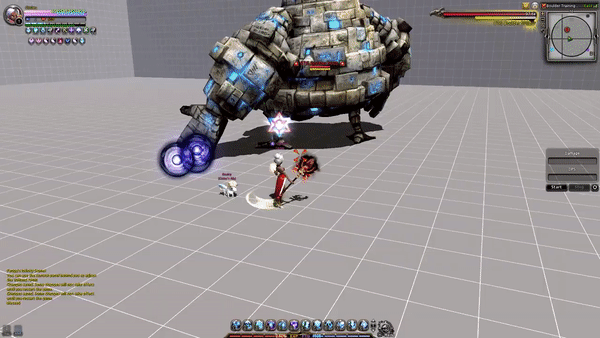
Golem Rotation
Golem rotation does not truly represent how you play the class. But it should realistically show your gameplay– as if you are in a nest/raid– even if the damage you do may not be the highest. For this reason, I purposely did not use [Gravity Trap] in the rotation video because it’s not realistic for the boss to stand still for the entire rotation. The video showcases 1T HP Golem with auto-debuffs turned on.
Town stats: ~1.76m MATK, 91.8% Dark ATK, 100% FD
BTG stats w/ buffs: ~2.38m MATK, 131.8% Dark ATK, 110% FD
Conclusion
Chaos Mage shines in environments where the boss tends to stand still for a while or where she’s able to accurately predict boss mechanics. In other cases, her lingering and stationary skills can be an issue to effectively deal damage when certain bosses are more prone to constant movement or when certain mechs regularly debuff/despawn your buffs and skills. In spite of this, she is well able to compete with other pure DPS classes when played properly. In addition, flow has been applied to many of her skills. This reduces the clunky gameplay she normally has and improves the fluidity of her skills to increase her survival rate.
Please feel free to message me with any questions, comments, or tips of how you think Chaos Mage can improve her gameplay. Credits to Echos, Fabulous, and MoraNiN – I learned how to improve my gameplay through their shared knowledge and recorded gameplay when I came back to DN after a long hiatus. Credits to Roy and Neo for implementing the rework!