 Project Duck News

Introduction
Note: This guide was adapted from Naka's guide to add Koshiro's input. Some sections were written by Naka while others were written by Koshiro.
Self Introduction
Hello! I'm Koshiro, I started playing Dragon Nest in 2015 and I always loved playing melee classes (at least the fast-paced ones), including Windwalker. Project Duck some time ago gifted us with a game-changer rework that made me fall in love with the class once again, and today I'm here to guide you through your way to conquer the skies and of course bosses.
By the way – if you're interested in learning about other classes, we have a Class Guide Archive. - Vino
Class
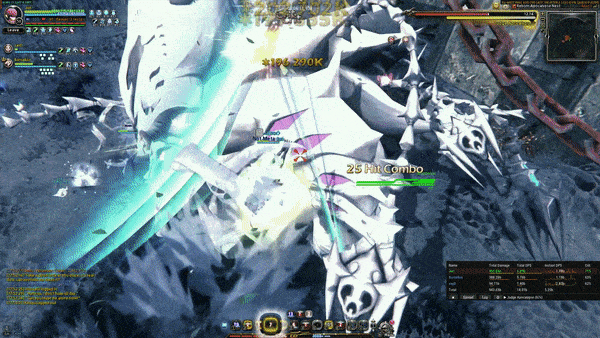
Windwalker is a fast-paced melee class with the ability to maintain herself in the air while fighting, which gives you the possibility of ground based attacks (not all) and DPS while others can’t. Her kit consists of fast attacks with extremely low cooldowns as long you maintain your [Momentum]. Consistency and Control is the key to extract her maximum potential.
Skills
Archer
[Willow Kick] - Now it can only be used in the air and only enhances [Cyclone Kick]. Has a decent airtime and filler damage.
Acrobat
[Somersault Dance] - Utility skill we borrow from our sister class Tempest, has iframe and also does filler damage, use it by pressing [Right Click] after any version of [Falling Star] and [Eagle Dive] to get off the ground again. It has 0 cooldown.
[Butterfly Float] - “Float like a butterfly, Sting like a bee”, said a wise man once. Our aerial tumble that will eventually save your ass from incoming attacks. Keep in mind it has a 1s base cooldown, so it's a reliable iframe that will always be there for you. If you press [Right Click] you can chain into [Spiral Kick].
[Ring Shot] - A weird skill but hey it got an -20% Critical Resistance debuff, if no one in your party got this debuff in his kit (and probably in a usable skill), you’ll want to use it to optimize your numbers. Has iframe on its startup but honestly you won’t need it because you have more optimal ways to dodge something.
[Spirit Boost]/[Spirit Boost Augment] - After rework this buff gets disabled once you learn your [Class Mastery], for balancing reasons.
Air Pounce] - Press [Spacebar] in the air to kick whoever is below you up to 5 times, each kick lifts you in the air a bit, first kick do more damage, you can use it between your combos as a filler or as a tool to keep/gain height when others skills are on cooldown and you can’t go back to the ground for some reason.
[Spiral Kick EX] - Our main movement tool, you can use it to chase running bosses or reposition yourself (even in the air!), you can also use it to push objects, the first kick is an iframe, you can press [Right Click] to kick ahead once again or [Spacebar] to kick upwards. Note that Spiral Kick is not affected by [Momentum]
[Eagle Dive EX] - One of our core DPS skills. It is affected by [Momentum], turning into a 5s cooldown instant dive that now can be used even in the ground. You can link it by pressing [Left Click] in the air after any aerial skill.
[Blooming Kick EX] - Our main DPS skill. It is affected by [Momentum], turning into 5s cooldown kick that shoots a wind projectile forwards, you can now use it in the air. Pressing [Left Click] after the first kick will kick one more time upwards while giving you a bit of height. Note that the projectile will spawn in the ground no matter how high you are and it hits even if you’re far from the boss (Blooming Kick works weird, if you hit the point-blank kick, the projectile won’t hit the boss again, but if you miss the kick the projectile can hit, dealing the same damage. The EX kick needs you to be close to hit confirm though). Also it inflicts our main debuff, 20% increase in damage dealt.
[Cyclone Kick] - A series of kicks with decent damage and airtime. Under [Momentum] buff you’ll be able to cast it midair, changing its animation to the former CM2 Instant and reducing its cooldown to 3,5s. The grounded version still exists with its iframe at startup, but you won’t ever use it ‘cause you’ll use it in the air along with [Willow Kick] due to our [Class Mastery 3]. The CM3 version don’t change animation wise but the LAST hit will do significantly more damage, DON’T CANCEL IT BEFORE THE LAST HIT PRESSING OTHER SKILLS MINDLESSLY
[Falling Star] - Our Heavy hitter. There is 2 versions of this Ultimate skill:
[Momentum Falling Star] - The standard version during Momentum, deals very high damage, but it's slow as you need to charge briefly (iframe) before slamming the ground.
[Awakened] Falling Star Instant - This version deals slightly more damage and it's way faster while still maintaining the iframe at startup. It doesn’t share its cooldown, and you can reset it entirely by using [Momentum Rising Storm] at 50 bubbles. (Although it only costs 20 bubbles to reset). You also receive a 10% ATK buff upon cast, so you will want to proc it often to maintain this buff.
Windwalker
[Show Time!] - Simply the heart of this class, say goodbye to being restricted by its short duration, as now you can maintain it during your whole fight or DPS window, depending on which content you’re running. Upon cast, you’ll now receive 2 differents buffs, one from Showtime itself, which is -30% cooldown of all your passive skills (this includes your regular [Tumble] and [Butterfly Float]) and one that you’re already familiar at this point. The most important part of this buff is that it allows you to stack Momentum.
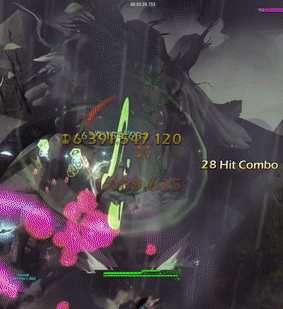
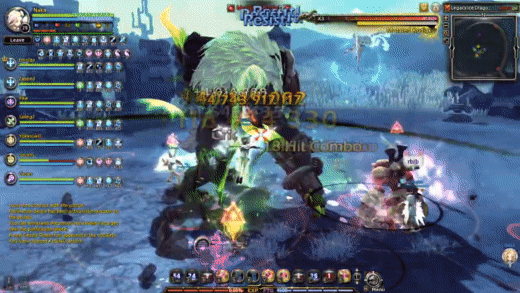
[Momentum] - This is your most important buff, as it changes your main skills to their [Momentum] versions, which Heal 1% of your HP per cast (don't underestimate it), and also it's the key to resetting your ultimate. Under this buff you’ll get a bubble for each hit from your skills and each bubble will give you 0.5% PATK up to 20 bubbles (10% PATK in sum). Note that your Momentum expires after 4s and you’ll lose the buff AND bubbles if you don’t hit anything within that time, so yeah you better learn how to continue DPSing even between mechanics/attacks that you’re able to.
[Rising Storm] - Finally the last DPS skill affected by [Momentum]. RS changes to its Instant version that can be used anytime with a 7 seconds cooldown. Note that [Momentum Rising Storm] is the only way to activate and reset your [Awakened] Falling Star Instant.
[Class Mastery] - Standard CM1 passive, gives you 50% AGI but disables the use of [Spirit Boost]
[Class Mastery II] - Standard CM2 passive, using [Rising Storm] will change [Falling Star] to its Instant version, if you use Rising Storm without 50 bubbles all you’ll see is the own cooldown of Falling Star Instant. Keep in mind you got a free cast of this at the very start of any run.
[Class Mastery III] - [Willow Kick]'s damage is greatly increased and can be used in the air. When you use [Cyclone Kick] under the effects of [Momentum] immediately after, the damage for the final kick is increased significantly.
[Flash Kick] - Filler skill with awful damage, it’s only useful to use between your skills in the air to maintain your height and generate bubbles quickly.
[Wind Cutter] - Formerly Swift Attack, changed to WWs 2nd awakening active skill. Keeps you in the air while shooting downwards 2 razor blades in X shape. It can hit up to 50 times, depending on boss size and/or the position you cast it. Also if you [Left Click] you will stay in the air as you kick the second blade, [Right Click] will throw yourself down, use what the occasion needs.
Invincibility Frames
Windwalker has many iframes, but the majority of them only have small windows so be smart in how you utilize them – the potential to chain a lot of these skills together gives you the potential for extended iframes.
- [Kick Shot]: The first few frames where you bend yourself in half while briefly going forward.
- [Chain Tumble]: Pretty much the whole animation.
- [Ring Shot]: Initial jump in the air.
- [Somersault Dance]: Entire animation.
- [Butterfly Float]: Basically the entire animation.
- [Cyclone Kick]: First two kicks.
- [Falling Star]: From the moment when you are in the air to the moment right before you strike a pose on the ground.
- [Spiral Kick]: Basically the whole thing.
- [Rising Storm]: When you do the splits and spin to win.
- [Swift Attack]: Basically the whole thing.
Pushing Skills
Windwalker isn't that great at pushing, but there's still some skills that allow you to help out with whatever object you need to be pushing. Skills are listed in order of most to least push potential.
- [Spiral Kick] / [Spiral Kick EX]: right click after [Spiral Kick] for an extra push (aka to activate the EX)
- [Cyclone Kick]: initial first three kicks
- [Spirit Shot]: I prefer to [Spirit Shot] after I've used [Spiral Kick EX] to push
- [Twin Shot]: just aim
- [Multi Shot]: this honestly barely pushes but if you're desperate use it (or just right kick...)
If you have [Showtime] up you can spam [Spiral Kick] → [Spiral Kick EX] → [Spirit Shot] (→ [Butterfly Float] backwards to chain into [Spiral Kick] again) over and over and over and over and over!
Skill Build
Unified Skill: Final Damage Boost
Skill Crests
[Falling Star DMG], [Blooming Kick DMG], [Rising Storm DMG/CDR],[Spiral Kick DMG],[Willow Kick CDR],[Eagle Dive DMG],[Cyclone Kick DMG].
+1 [Blooming Kick]
Dragon Gems
Elemental conversion of your choice + 3 Elemental gems
Also AGI/windswept gems, duh.
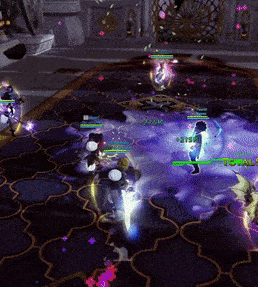
Gameplay
Mobility, Dodging, and Repositioning
Windwalker has the ability to constantly change her positioning, so it is important to understand how her passives (along with [Flash Kick]) can chain together, as this can give you extended iframes. I would highly recommend practicing chaining different passives together in BTG. Here are some examples:
- [Chain Tumble] --> [Air Pounce] --> [Butterfly Float]
- [Chain Tumble] --> [Spiral Kick] --> (right click) [Spiral Kick] --> [Flash Kick] --> [Butterfly Float]
- [Air Pounce] --> [Butterfly Float] --> [Flash Kick] --> [Butterfly Float]
Keep in mind that you can [Chain Tumble] in any direction on the ground, which gives you a lot more flexibility with chaining together your passives. I'll often use [Chain Tumble] or [Butterfly Float] backwards to dodge skills (holding S) and then [Spiral Kick] forward to maintain my positioning so I can continue DPSing.
As almost every melee class in this game your kit has a lot of iframes and mobility. After getting yourself experienced with the class you'll notice that practically every incoming threat or change has an immediate response or countermeasure, being able to play around all situations while still doing your numbers.
Professor K is about to throw a punch into your face? [Butterfly Float] through it.
Boss teleported somewhere due to some mech or is running away from you? Chase his ass with [Spiral Kick]
Mechs? pff. We don’t do that here, greed is always the answer (when you're confident).
- Video by Pikachun
You can also ignore some attacks such as Ligna pull.

These are just basic examples and there’s lots of different scenarios like this, within some practice and time you’ll notice you’re stylin’ on bosses in ways you’d never imagine.
Control the height
With all this vertical and horizontal mobility and short cooldowns in our kit, initially you might have a hard time keeping yourself in range of your skills in the air, especially on small bosses, learn to control your character to avoid staying too much above the boss as your skills will most likely miss and you could lose your Momentum. [Wind Cutter] Right Click or [Moon Kick](Right Click) after [Rising Storm] are your best friend.
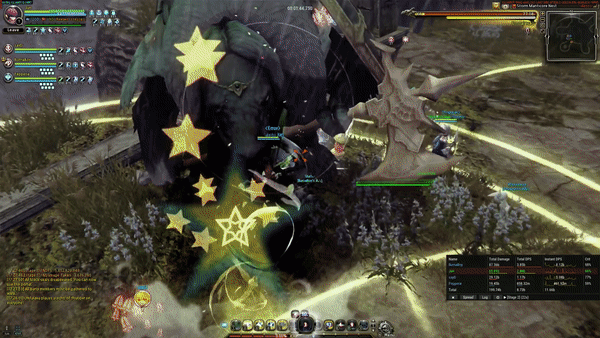
Also note that just because you're in the air doesn't mean you're immune to ground attacks, some come from the ground but still have enough AoE to get you up there, or just are global, like one of the "stomps" of the third boss of the Manticore Nest. As you run through contents, you will understand what will force you to use an iframe or get out of the way even while flying.
Maintain your Momentum at all costs (except your life)
There will be a lot of pauses where bosses will turn invincible, get in a hard position for you to DPS, or force you to stop and do mechs. In most cases you can’t do anything but just take the L and start over your Momentum again. But there is rare cases you can still maintain your buff between some pauses if you:
- Time projectiles from skills like [Blooming Kick] or [Wind Cutter] correctly to hit boss asap
- Use [Black Dragon - Death Flag Salute] crest to buy time if you need to get far from bosses and the [Momentum Blooming Kick] projectile isn’t enough.
- Cast [Showtime!] again, doing so will give you 1 momentum bubble, thus refreshing its duration.
- Hit Minions or Summons. Use the environment in your favor.
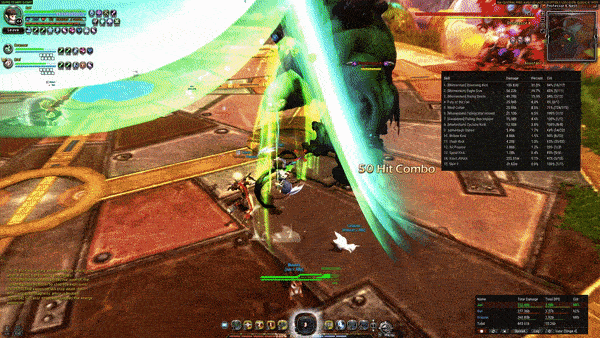
Rotation
After buffs(Fury of the Owl+Show Time!):
Starting with 50 bubbles + [Momentum] Falling Star Instant ready:
Blooming Kick[Left Click]>[Momentum] Falling Star Instant [Right Click]>Rising Storm>[Momentum] Falling Star Instant [Right Click]>Eagle Dive[Right Click]>Flash Kick>Air Pounce>Wind Cutter>Willow Kick+Cyclone Kick
Starting with 0 bubbles:
Blooming Kick[Left Click]>Rising Storm>[Momentum] Falling Star or [Momentum] Falling Star Instant (if any of them are available)>Eagle Dive[Right Click]>Wind Cutter> Willow Kick+Cyclone Kick>Repeat
This is just an example of how I open my rotations. Windwalker can be well flexible in this matter and you can freestyle and adapt your combos in the most comfortable way for you, just remember to be aggressive and pay attention to your bubbles, cast Rising Storm as soon as you hit 50 bubbles again.
BTG Rotation Example
- Video by Pikachun
Conclusion
Windwalker is a very fun and easy class to play, it can really outshine other classes in early to mid content which can be bursted and/or contents where bosses have larger dps windows as she is heavily dependent on her bubbles and its buffs. You have to keep in mind that at bosses with a lot of pauses for mechs which you can’t maintain your bubbles you’ll be starting over with -20% raw attack power than the rest of your party at each reset (I noticed that there's a lot of people don’t realize this, mainly who don’t really played the class. Once an idiot argued with me saying WW losing its bubbles doesn't harm her dps. LOL).
And in some cases you won’t have enough time to rebuild your passive buffs (10% from bubbles, 10% from FS Instant) again as the boss can just throw another mech at you and turn invincible again. It may sound frustrating but that's how the class works and honestly you should be OK with that since it's most likely a tradeoff for her busted kit and flying capability.
Special Thanks:
-Ymir for roasting me and helping me getting better
-Pikachun for providing videos